My Personal Portfolio
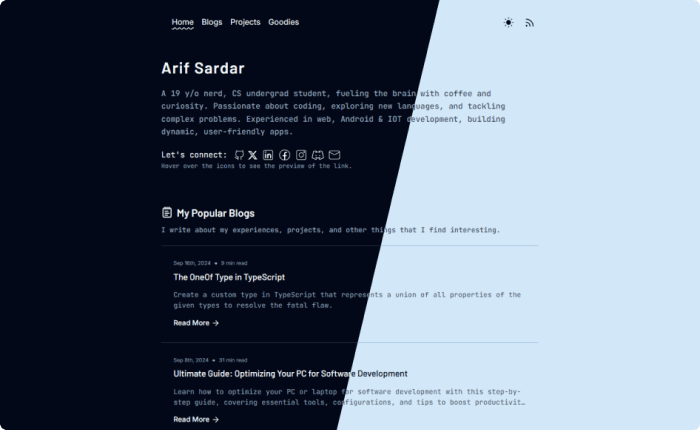
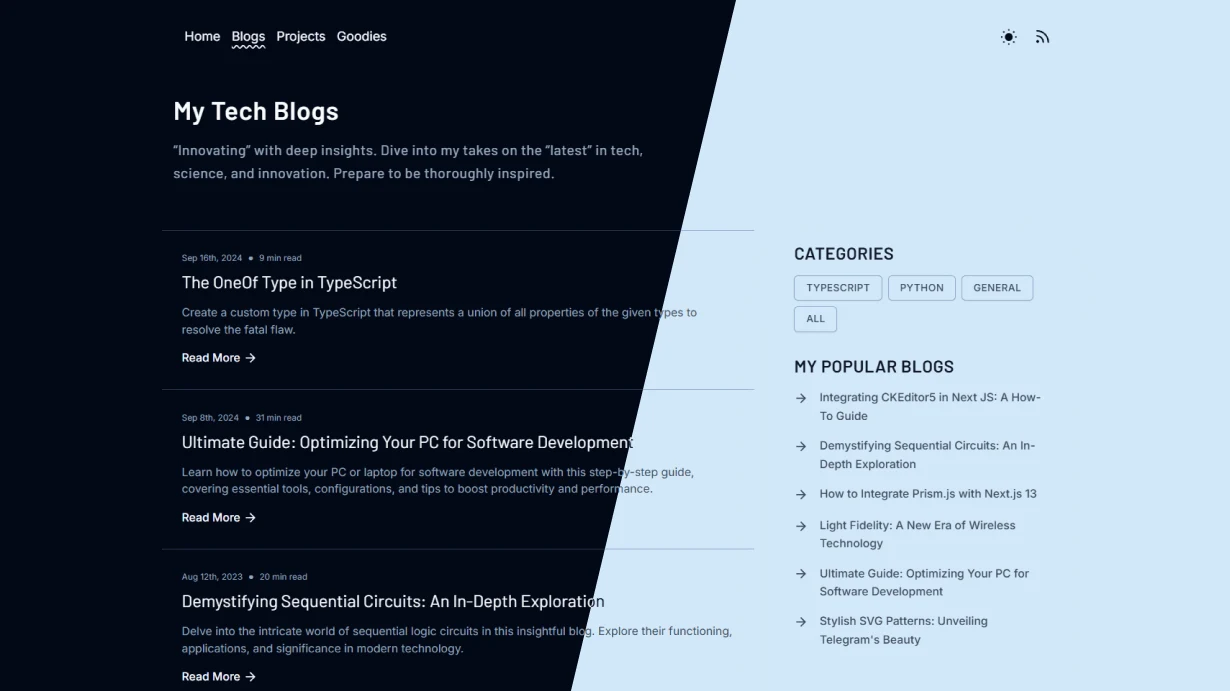
The website you’re seeing right now. Designed to be pretty, simple, and lightweight. It showcases my projects, skills, and experiences in a clean and user-friendly interface.

24th May, 2023
20th Dec, 2024
10 min read
TL;DR
Here’s the website you’re browsing—it’s the nucleus of my online presence. Think of it as a digital extension of me: my personality, my brain, my projects, and my curated knowledge, all wrapped up in one place. Dive in, explore, and discover the essence of who I am through my personal portfolio.

Why Have a Portfolio?
In today’s digital world, a portfolio is more than just a showcase—it’s your story. For a tech enthusiast like me, it’s an essential tool for presenting my skills, projects, and ideas in a way that resonates with both technical and non-technical audiences. It’s not just about displaying what I’ve done—it’s about connecting the dots of my journey, showing how I think, create, and solve problems.
As someone passionate about technology and innovation, having a portfolio is crucial for building a personal brand, expanding professional networks, and seizing career opportunities. It offers a structured platform to demonstrate expertise, document achievements, and share knowledge. More importantly, it serves as a gateway for others to understand my work ethos and vision, making it a cornerstone of my digital identity.
How I Built My Portfolio?
Over the years, I’ve built multiple iterations of my portfolio, each reflecting a significant shift in design, content, or underlying technology. This time, I took on the challenge of rewriting the entire site from scratch, aiming for a distinctive look that stands apart from all my previous versions. Through this process, I’ve honed my skills in crafting more optimized, efficient, and high-performing code, leveraging the wealth of experience I’ve gained along the way.
Evolution of My Portfolio
The journey to my current portfolio has been one of growth and learning, marked by several iterations. Each version reflects a snapshot of my development as a web developer and a creator, showcasing the evolution of my skills and design sensibilities.
- CodeWithArif (code-with-arif.github.io) - (Active)
- CODE WITH ARIF (code-with-arif.vercel.app) - (Deprecated)
- Arif Sardar (portfolio--v3.vercel.app) - (Active)
The Tech Stack
Next.JS
^15.0.3
React
^18.3.1
MDX
^0.3.1
ContentLayer2
^0.5.3
Typescript
^5.6.3
Tailwind
^3.4.14
ShadCN
Latest
FramerMotion
^11.11.11
As the core technology, I chose Next.JS 15, a powerful framework built on top of React. While alternatives exist, I leaned on Next.JS because it aligns with my expertise and offers seamless deployment through Vercel. As the creators of Next.JS, Vercel simplifies hosting with automated workflows, sparing the need to manage intricate cloud-native configurations. Next.JS excels in user experience, performance, asset optimization, and SEO. Its file-based routing, Rust-based compiler, and cross-platform compatibility streamlined my development workflow. In production, features like caching, SSG, SSR, and prefetching routes ensure that the application runs efficiently and delivers a high-performance user experience.
└── my-personal-portfolio
    ├── content
    │   ├── blogs
    │   └── projects
    ├── contentlayer.config
    ├── public
    ├── src
    │   ├── analytics
    │   ├── app
    │   ├── components
    │   ├── lib
    ├── components.json
    ├── contentlayer.config.js
    ├── next.config.ts
    ├── next-env.d.ts
    ├── next-sitemap.config.js
    ├── package.json
    ├── postcss.config.mjs
    ├── tailwind.config.ts
    └── tsconfig.json
Content Management
This website is more than just an online presence—it's my second brain, a digital repository where I organize and share my experiences, thoughts, and knowledge. From insightful blogs to comprehensive project overviews, it serves as both a personal archive and a medium to connect with others who share similar interests.

I use MDX to author my blog articles—a powerful fusion of markdown and JSX (JavaScript XML). It extends traditional markdown by enabling features like embedding React components, using JavaScript expressions, leveraging IIFE (Immediately Invoked Function Expressions), and incorporating ESM modules, providing unparalleled flexibility for dynamic content creation.
To centralize and manage all my content efficiently, I utilize ContentLayer (specifically ContentLayer2, due to version compatibility issues). It enables me to structure every blog and article within a single content folder, ensuring a type-safe and consistent experience throughout the application.
Using MDX can sometimes be exhausting since even minor updates, like fixing typos, require rebuilding the entire website and pushing it to production. Despite this, I believe MDX offers the best approach for authoring my blogs. It allows me to seamlessly integrate React components directly into my posts, enhancing interactivity and flexibility. Moreover, by hardcoding the content, I eliminate the need to fetch it from remote sources, leveraging caching to boost performance and ensure faster site responsiveness.
Elevating the Art of Styling
Personally, I’m a dedicated fan of Tailwind CSS, and it’s my go-to framework for every project—including this portfolio. Tailwind empowers me to write code faster and more efficiently by keeping styles directly alongside the HTML elements they affect. This approach simplifies debugging and makes updates a breeze, eliminating the tedious task of hunting through separate CSS files for equivalent class or ID definitions. Tailwind’s "just-in-time (JIT)" philosophy—where only the CSS classes actively used in the project are generated during build time—ensures a highly optimized and lightweight CSS bundle. This results in faster loading times and an overall boost to site performance, making it an invaluable tool in my development arsenal.
Occasionally, I turn to traditional CSS, particularly for more complex styles or specific use cases. For this, I leverage SASS—a powerful superset of CSS that introduces advanced features such as nested styling (now also available in CSS), mixins for reusable code snippets, modules for better organization, and variables for consistent theming.
View Transition
While navigating through the pages, you’ll experience smooth fade-in animations that enhance the visual flow. When the header is resized or moved to a new position, it gracefully slides into place, ensuring a seamless transition.
The powerful browser API for view transitions plays a crucial role in simplifying layout changes by handling the complex processes seamlessly. While it’s not yet supported across all browsers and remains in active development, it adds a touch of modern sophistication to the portfolio, ensuring a polished user experience. Additionally, fallback mechanisms ensure compatibility for unsupported browsers, maintaining a consistent experience.
The working principle of the API is straightforward yet effective. It captures a snapshot of the page before the transition begins, then manipulates both the snapshot and the real DOM to create smooth animations. By sliding and fading elements, it gives the illusion that the same elements are seamlessly transitioning between pages.
To integrate view transitions in Next.js, I utilized the next-view-transitions package. This requires wrapping the entire application with the <ViewTransitions> context to enable smooth transitions when navigating backwards in history. For navigation, the package provides a <ViewTransitionLink> component, which replaces the traditional Next.js <Link> component. Additionally, it offers hooks like useTransitionRouter() and useBrowserNativeTransitions() to enhance functionality. I leveraged these hooks to create a custom <Link> component, incorporating further tweaks to align it with the portfolio’s unique requirements.
Sitemap generation
A sitemap is an XML file that lists all the pages of a website, serving as a roadmap for search engines to index content effectively. It enhances discoverability and provides insights into the website's structure, making it easier for users and crawlers to navigate. Feel free to explore the sitemap for my portfolio as well.
To automate the generation of sitemaps, I utilized the next-sitemap npm package. This tool seamlessly creates sitemap and sitemap-index files as part of the build process, catering to static pages out of the box. However, for dynamic content, I implemented a custom API to dynamically serve the content. Specifically, in the files blogs-sitemap.xml/route.ts and projects-sitemap.xml/route.ts, I defined a GET method that delivers paginated content based on the [page] parameter, starting from 0. Using getServerSideSitemap() and getServerSideSitemapIndex() functions from next-sitemap, I structured the dynamic content into proper XML sitemap files, ensuring comprehensive coverage for both static and dynamic pages.
RSS Feed generation
RSS (RDF Site Summary or Really Simple Syndication) is a web feed that allows users and applications to access updates to websites in a standardized, computer-readable format. Subscribing to RSS feeds can allow a user to keep track of many different websites in a single news aggregator, which constantly monitors sites for new content, removing the need for the user to manually check them. [From Wikipedia]
Next.js does not natively support RSS feed creation, nor could I find a suitable npm package to handle this task. So, I built the functionality from the ground up. Drawing inspiration from my approach to sitemap generation, I opted for a template string instead of getServerSideSitemap(). By dynamically embedding the necessary values within the template, I crafted an efficient and custom solution to generate the RSS feed.
Feel free to explore the RSS Feed for my blogs for reference.
Observability
Monitoring the portfolio's traffic and blog views offers valuable insights into the relevance and appeal of my content, helping me decide future blog topics. By sharing these statistics with readers, I aim to build trust and assure them of the content's reliability.
Analytics
For overall analytics, I utilize Vercel's Web Analytics service, which delivers comprehensive insights into my portfolio’s performance. This includes key metrics such as page views, visitor counts, and activity on specific pages, all further refined by filters like country, operating system, and more. The free tier offers analytics for the past 30 days, while upgrading to the pro plan extends this window to 24 months, providing a more extensive view of trends over time.
Blog Views
To display views for different blog posts, I leverage the XATA database due to its cost-effectiveness compared to Vercel APIs. I implemented a middleware that checks if a request is for a blog page. When such a request comes in, it first serves the page and then updates the database with the view count, storing additional details like unique visitor counts and IP addresses. The serverless event.waitUntil() method plays a crucial role in keeping the instance active until the database operation completes, ensuring accurate and efficient tracking without compromising performance.
Performance Monitoring
For page performance, I rely on Vercel's Speed Insights service. Think of it as an enhanced version of Lighthouse, offering regionally distributed data and tailored performance metrics specific to Next.js applications. This service enables me to identify and resolve any inefficiencies in my site quickly, ensuring an optimized user experience. Additionally, it integrates a handy toolbox directly within my portfolio, allowing me to perform various operations without needing to access the dashboard. This setup also provides real-time performance updates, making monitoring and improvements more seamless and efficient.
Conclusion
Throughout my journey of building this portfolio, my primary objective was to make it feature-rich yet simple, efficient, user-friendly, well-organized, and visually appealing. During the development process, I encountered numerous challenges, including bugs, errors, and decision fatigue. I aim to write articles describing how I tackled these issues, found solutions to the problems, and developed various rules and theories to overcome decision fatigue.
The entire journey of building this portfolio has been an incredibly enriching experience—one filled with countless lessons, memorable challenges, and rewarding accomplishments. As I delved deeper into the intricacies of web development, each hurdle taught me something new and each breakthrough solidified my skills further.
Moving ahead, my vision for this platform extends beyond just a personal showcase. I plan to actively write insightful blogs that share my knowledge and experiences while continuously updating the projects section with my open-source contributions. This way, I aim to create a space where visitors can effortlessly discover, learn, and engage with my work, fostering a meaningful connection through this digital gateway.